How-to: Select a Resource When Scheduling a Flex Appointment – Android Application
- Search “QLess” in the Google Play Store on your Android, version 4.0 or higher, mobile phone or tablet. Download and install:
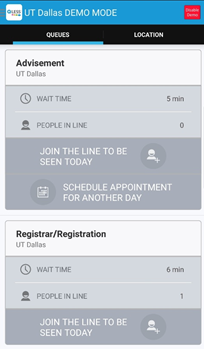
2. Touch the option to Schedule Appointment for Another Day. Note, this option will only be available for departments and services for which FlexAppointments have been specifically enabled:
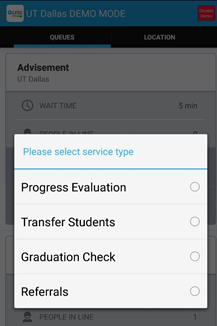
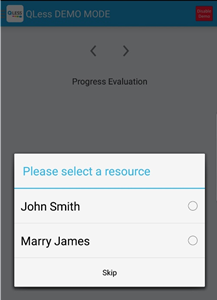
3. Choose the reason for your appointment. For this example, we’ve selected ‘Progress Evaluation’
4. Choose the specific resource (or person) with whom you would like to schedule your appointment. For this example, we’ve selected ‘Marry James’. You may also elect to skip this detail; in which case your appointment would be made for any available resource within the service department on the day of your appointment:
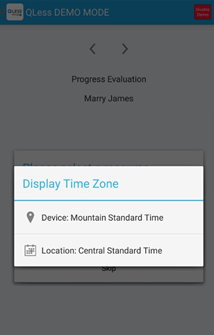
5. If you’re scheduling your appointment from a time zone that differs from the institution’s, the system will detect the difference. Please select the appropriate option:
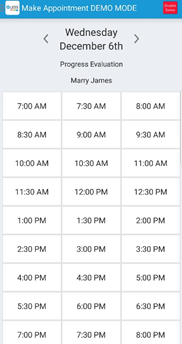
6. Next, choose your appointment date and time. You may toggle different dates by touching the right arrow. Note, you may only book an appointment for the times listed on this screen, which are preconfigured by the institution. For this example, we’ve selected December 6th at 6:00 p.m.:
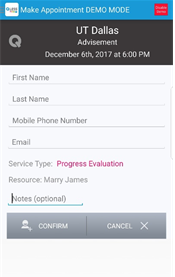
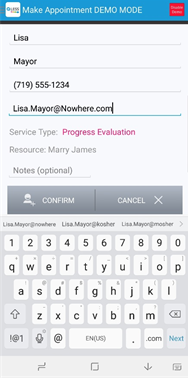
7. Now enter your identifiable details and touch Confirm:
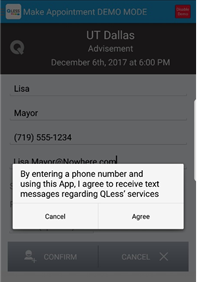
8. The following disclosure will appear. If you consent to receiving text messages regarding QLess services touch Agree:
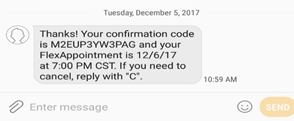
9. You’ll receive a similar text message confirming your FlexAppointment date and time:
10. Next, the following message will appear on the Android application:
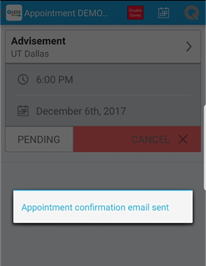
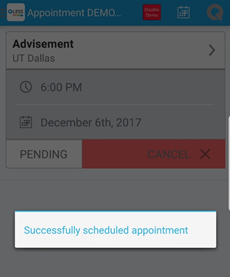
11. Your appointment has been successfully booked with the resource of your choosing, when you reach this screen: