How to Choose a Resource When Scheduling a Flex Appointment via the iOS application
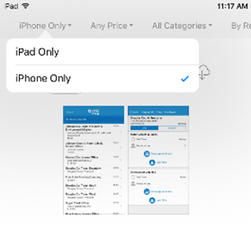
- Search “QLess” in the Apple Store, on your iPhone or iPad. If using an iPad, be sure to change the filter in the upper left corner to “iPhone only”, or you will not be able to see the consumer iOS version of the QLess application:
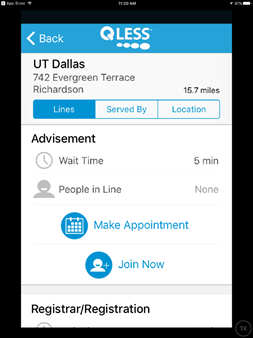
2. Touch Make Appointment to begin. Note, ensure the Lines option is highlighted in blue, otherwise you will not see the make appointment option:
3. Enter your personal details:

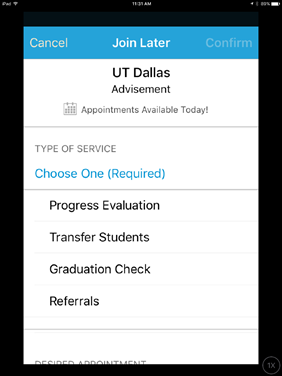
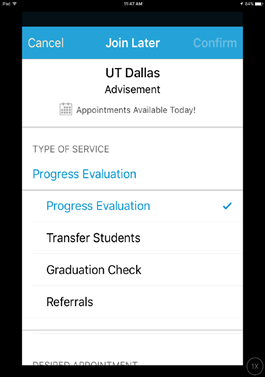
4. Scroll up to Type of Service and touch Choose One (Required) to expand the menu of service types. Then choose the reason for your appointment. For this example, we’ve chosen ‘Progress Evaluation’. A blue check mark will appear next to your choice. Touch the service you’ve selected once more to collapse the type of service menu:
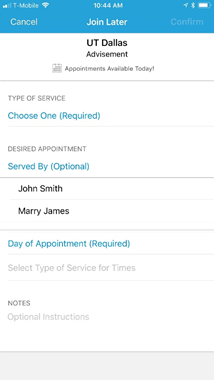
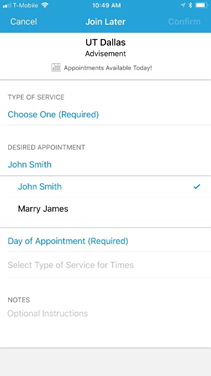
5. Scroll up to Served By (Optional) and touch this option to the expand the list of resources with who you may schedule a FlexAppointment. A blue checkmark will appear next to your selection:
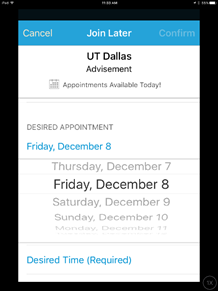
6. Scroll up to Desired Appointment and touch Day of Appointment (Required) to expand the calendar. The calendar is designed in a scroll effect. Slide your finger up or down to your desired date and touch the day you would like to book. The date you’ve selected will now appear, highlighted in blue, atop this menu. Touch it once more to collapse the calendar:
7. Scroll up to Desired Time and touch Desired Time (Required) to expand the list of available time slots. The clock is designed in a scroll effect as too. Slide your finger up or down to your desired time slot. Once touched, your selected time will appear, highlighted in blue, atop this menu. Touch it once more to collapse the menu of time slots.
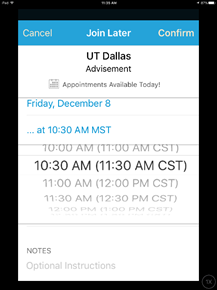
8. You may elect to scroll up to Notes to leave a little extra detail about the reason for your visit such as, “I need to know how many credits I need to graduate”, etc. Or, simply press Confirm in the upper right corner. Your appointment date and time will show as confirmed:
9.
- If this is your first time joining a queue from the iOS application, you may be presented with the following disclaimer. If you agree to receive text messages regarding QLess services, touch Allow:
This is required in order to use the consumer application to join your virtual Queue, and manage your place in line:

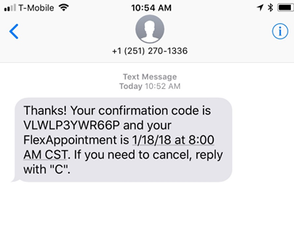
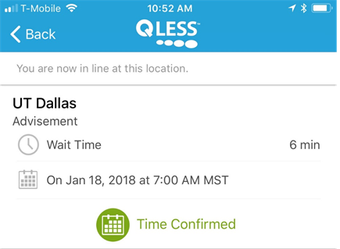
10.At this point you will receive a text confirming your FlexAppointment date and time: