
The Queues tab includes the list of your current QLess queues. From this tab, you have the options to add queues as well as associate transaction types (if enabled). Please note that you will only be able to add queues if your current account level allows this. If not, steps needed to upgrade will be given.
- To change basic queue settings, click Edit under Actions on the main Queues screen. Config Admin users can make basic queue changes on this screen. There are many options that can be edited from this screen including many time related settings as well as queue open and close times!
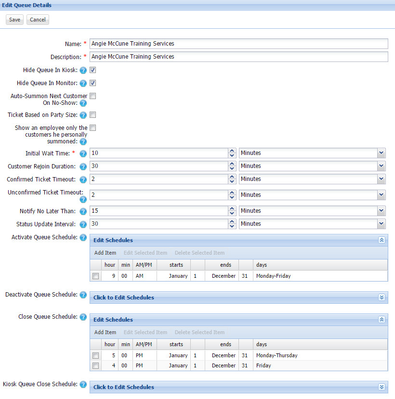
- To learn more about the features that can be changed at the queue level, hover your mouse over the blue question mark icon to view the tool tip.

- At the queue level, you have the ability to upload an image to represent each queue. Here is an example:

To add queue images, click on the name of the queue and then click "Edit" and scroll to the bottom of the page. Then click "Upload New Image" to insert your file. Browse to the file and then click "Ok".
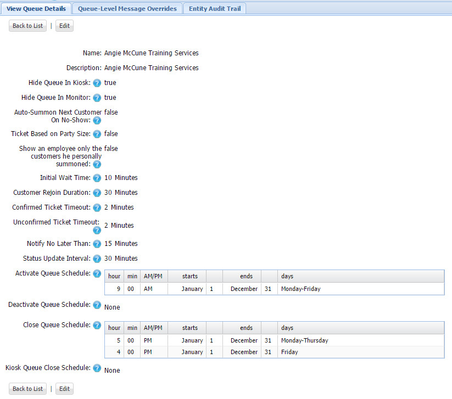
Preferred file information - 300x140 (JPG or PNG) - To update queue-level message overrides, click on the name of the queue from the main queue screen. This will show you the tabs found within the queue setup. Then, click on the tab labeled Queue-Level Message Overrides. For more information on how to edit message overrides, view the information on updating merchant-level message overrides.
Associating Transaction Types with Queues
If you have transaction types (Types of Service) enabled on your account, QLess Command Center can be used to associate these with your queues. Please note that currently, QLess Support will need to create the transaction type for you.
- To associate transaction types, click on the Associate Transaction Types button under the Queue tab.

- You will be asked to select a location. Once you select a location, a list of transaction types for that location will appear.

- Here is an example of what a transaction type list might look like (IDs and names hidden). Check and uncheck boxes as need to associate transaction types to queues.

- If you have made changes, click Save!