Creating a FlexAppointment - Guide for Consumers
This guide shows the options your customers can utilize to create a FlexAppointment.
Current Options Availabe to Schedule Appointments
Home Kiosk
On-Site Kiosk
Android & iOS Consumer Apps
Home Kiosk
Go to the institution’s website and click on the link to schedule your FlexAppointment.
A screen similar to this will appear:
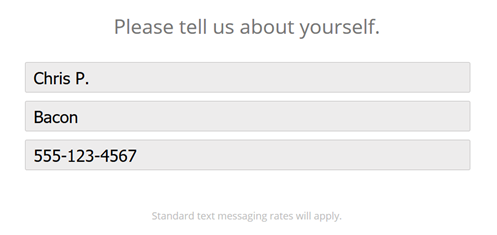
After the customer completes their First Name, Last Name, and (Texting-capable) Phone Number, you click the NEXT Button (bottom right of the screen).
They may also have to select a service or queue that they would like to join. There may be one or two other screens (ID or other custom information) to fill out, but they will get to a screen asking them to pick a good day/time for their appointment.

The left arrow button moves backward in time (though it is greyed out, at first, because there are no appointments for yesterday).

The right arrow button moves forwards in time (tomorrow, the next day, the day after that…). The whole time, the day and date selected appears in the center of the bar and keeps updating each time the left or right arrows are clicked.

Just below the Navigation Bar, are the available time slots for their appointment. At this point, the customer will click the desired time slot –if it is listed, it is available.

There might be an additional screen after selecting a time that requests an email address if configured.
The customer will receive a text message confirming their appointment as well as an email (if configured).
On-Site Kiosk
- Click on or tap the screen of the On-Site Kiosk. The screen changes to show you:

Customers MUST enter a phone number to make a FlexAppointment. Those joining by name or ticket number will not be given the option to schedule FlexAppointments.NOTE: It is possible to display a digital keyboard whose keys can be tapped or clicked. It is triggered by the Show Keyboard Button at the bottom-center of the screen.
After entering the required information and selecting a queue and/or services, they will see a screen similar to this:
- At this point, the steps to navigate the days and times are the sames as those found in Home Kiosk (above).
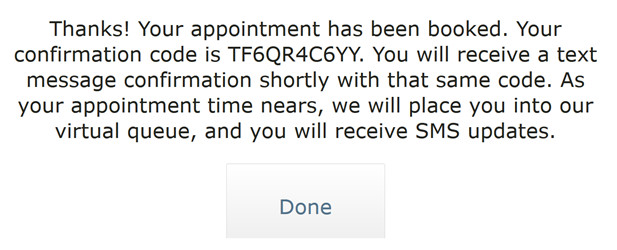
- As with Home Kiosk, the customer will receive a confirmation text and email (if configured), as well as being shown their confirmation number on the final screen.
Consumer Apps
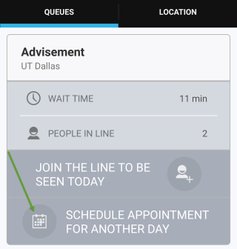
If you offer FlexAppointments and your customer has an Android or iOS phone, they can use the QLess App to join your line as well as schedule a FlexAppointment. They will follow the steps below:
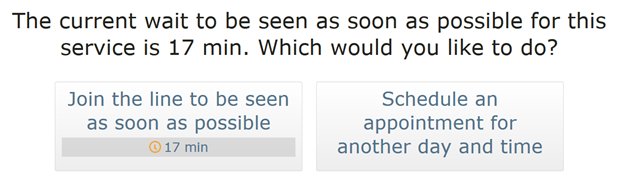
- Select the queue they wish to join, and tap the "Schedule Appointment for Another Day" button.
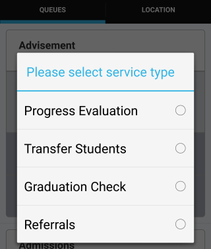
- If there are multiple options for service, the customer will be asked which service for which they want to schedule their appointment.
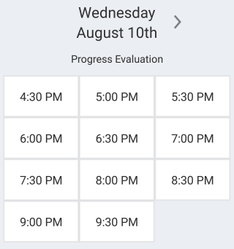
- Next, customers will select the day and time of their appointment. The arrows near the date can be used to toggle between the days, then they will tap the time of their choice.
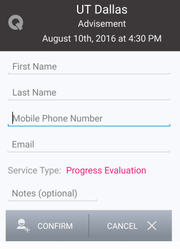
- Then, the customer will complete the required fields which include the name, phone number, etc. and tap "Confirm".
- After receiving a notification that the appointment was successfully scheduled, the customer will be able to see their list of schedule appointments by tapping on the QLess logo in the upper-left corner, and then selecting "Appointments".
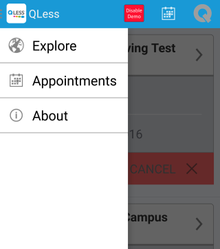
- This view shows the status of the appointment, as well as the ability to Cancel the appointment.
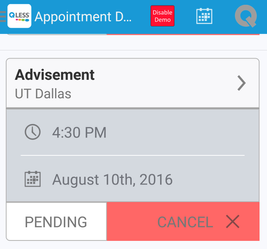
Please note that the screenshots above are from an Android phone, but the iOS experience is very similar.
Related articles